
How to cook and store your food in the Enchantments
If you’re planning your first backpacking trip, choosing a stove system and creating a meal plan can be daunting. Follow this guide for a tried-and-true solution that’ll work great for your trip to the Enchantments.
Stove
Our recommended stove system for beginner backpackers is simple: just an isobutane fuel canister, a pocket-size stove burner, and a titanium cup.
This setup is enough to boil water, which will allow you to cook a tasty variety of premade dehydrated meals. You cook them simply by pouring boiling water into the resealable pouch, closing it, and waiting for 10 minutes or so. Check out our meal planning guide for more info.
This stove/pot combo is half the weight and half the price of popular all-in-one systems like the Jetboil MiniMo or MSR Windburner. The only thing these systems have going for them is shorter boil times and better fuel efficiency in very windy conditions. We think that for most backpackers, our cheaper, simpler and more versatile system is the best choice.
Accessories
You’ll need either a matchbook or a lighter to start the stove. A mini Bic lighter weighs less than half an ounce and will last a long time. Some stoves come with a built-in piezo igniter (though the PocketRocket does not), but even if yours does you should bring a backup, since the igniter sometimes fails.
You’ll also need a utensil to eat with. You could just bring a spoon from home, but a lighter option is a titanium spoon from Toaks. It has an extra-long handle which is great for reaching down into the bottom of backpacking meal pouches.
Finally, if you choose to cook and eat in the cup rather than the pouches that your dehydrated foods come in, you may want to make yourself a mini sponge (just cut about 1″ off the end of a normal kitchen sponge) which will help with cleaning your pot on the trail. Be sure to scatter the dishwater over some dirt (don’t pour it into a waterway!). And leave the dish soap at home – it’s bad for plants and fish, and you really won’t need it.
Food storage
You’ll need a way to store your food (as well as your trash and any other smelly items like toothpaste or deodorant) so that wild animals don’t get to it during the night. This is important for your happiness but even more important for the animals. Small animals may die if they eat human food. Large animals like goats or bears may pose a danger to humans if they become accustomed to eating human food. The Forest Service is required to track and kill these animals.
In the Enchantments, you have three good options:
- a hard-sided bear canister
- a soft-sided bearproof sack (which you must tie to a tree trunk)
- an odor-proof plastic bag
Bear canisters are the most reliable way to protect animals from your food. They are foolproof and work in any kind of terrain, and against animals of any type. In many National Parks, bear canisters are the only allowed form of food storage in the backcountry.
Our favorite bear canister is the BearVault BV450. You’ll easily be able to fit 4 days of food for one person in it. Some people manage to fit more than a week’s worth of food in the BV450, but that will involve a lot of careful repackaging of food and tradeoffs about what kinds of stuff you’ll eat.
If you need to carry a lot more food than this, you should consider the BearVault BV500, which is 60% bigger than the BV450. It weighs 9 oz more.
A drawback to using a bear canister is that it’s bulky and heavy. Our top pick weighs over 2 pounds empty, and its shape makes it tricky to position comfortably in your pack.
A lighter alternative is a bearproof sack. They require a tree of the appropriate diameter (about 10″ is ideal) to tie them to. When secured correctly, the sack resists a bear trying to tear it open (though it won’t prevent your food from being crushed and slobbered on). Be sure to tighten the cinch cord enough to prevent rodents from sneaking in through the opening.
We like the Ursack Major 10-liter bearproof sack, which holds even more food than our BV450 and yet weighs less than one quarter as much.
Ursack Major Bear Sack (10 Liter)
- Capacity:
- 10.7 liters (650 cubic inches)
- Weight:
- 7.6 oz
- Price:
- $90
An odor-proof plastic bag requires the most expertise to use correctly, but it is the lightest of the three. It depends on animals not finding your food, which means you have to practice very, very good food hygiene. You must cook and eat far away from your campsite, and ensure that no trace of food gets on the outside of the bag.
LOKSAK OPSAK Odor-Proof Barrier Bags, 12" x 20"
- Capacity:
- unstated, approximately 10.25 liters (625 cubic inches)
- Weight:
- 0.8 oz
- Price:
- $13.50 for a two-pack
No matter which method you choose, you should always store your food and other smelly stuff far away from your campsite (200 feet is a good guideline). Never store food in your tent. And be sure to securely store your food any time you’re not around (e.g. if you leave it behind for a day-trip).
Why not hang your food?
The classic way to store food while backpacking is by hanging your food in a bag from a tree branch. While this method can be effective, we don’t recommend it in the Enchantments for two reasons.
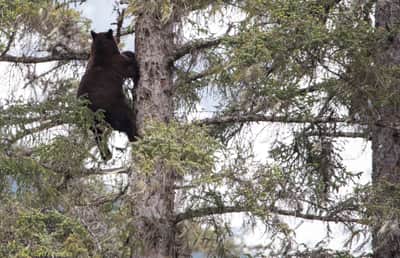
First, hanging your food effectively is deceptively difficult. Bears are excellent climbers, and can easily retrieve a poorly-hung food bag. And novice backpackers often underestimate the difficulty of finding a suitable tree, throwing a line over precisely the desired branch, and tying off the bag securely. It takes lots of practice to be able to hang a bear bag quickly and reliably.
Second, even if you’re a bear-bag-hanging expert, this method won’t work in the Core Zone since there are virtually no trees in this area big enough for an effective hang.